How to Paint a DIY Mural (Beginner-Friendly + No Gatekeeping)
- Ana Gabriela

- Feb 12
- 3 min read
I get asked this all the time:“How do you actually paint a mural?”
The honest answer? There are many ways to do it.But for your first mural, you don’t need fancy tools, art school training, or a perfectly smooth process.
This post breaks down the most simple, streamlined way to paint a mural as a beginner—without overwhelming yourself or your wall.


Step 1: Find Your Wall (and Really Look at It)
Before you think about design or paint, start with the wall itself.

Ask yourself:
Is it flat?
Lightly textured (like orange peel)?
Heavy texture (stucco, brick, concrete)?
Wall texture matters a lot. Some surfaces—especially stucco—are not beginner-friendly and make clean lines very difficult.
For your first mural, I recommend:
A flat wall, or
A lightly textured wall if that’s all you have access to
Save heavy textures for later when you’ve built confidence.
Step 2: Choose a Design That Matches the Wall
Once you’ve chosen your wall, it’s time to decide on the design.
Most muralists design digitally using tools like Procreate or other tablet drawing apps.
Digital design makes it easy to:
Make changes
Fix mistakes
Superimpose your design onto a photo of the wall to preview the final result
That said—you do not need a tablet to be a muralist.I started the old-school way: pencil and paper, and it works just fine.
Choose a design with:
Simple shapes
Limited colors
Minimal tight detail for your first mural
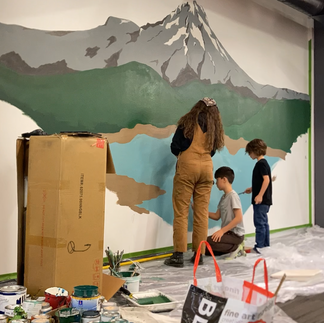
Step 3: Transfer the Design to the Wall (Doodle Grid Explained)
How to Grid Map a Mural (Beginner Method)
1. Make the Grid on the Wall First
Using chalk or a pencil, draw a grid directly onto your wall.
Draw doodle like characters on the wall (using you ABC is an easy option)
The grid does not need to be perfect; have fun with it
This grid becomes your guide.
2. Overlay Your Design Using a Phone or Tablet
Once the doodle grid is up, open your design on your phone or tablet.
Snap a photo of the wall. Upload it to your design app. Then put your design over it and make it be 50% opacity. Now use that image as a reference to draw your design.
3. Transfer using the doodle grid
Now comes the magic. Work little by litte:
Focus on basic shapes
Ignore details at first
Think “where does this line enter and exit the doodle?”
Repeat this process across the wall until the full design is sketched in.

Why a Doodle Grid Works So Well
This method:
Keeps proportions accurate
Prevents stretching or distortion
Helps beginners avoid getting overwhelmed
Requires zero expensive equipment
It is slower than freehand, but much more forgiving, which is exactly what you want for your first mural.
Step 4: Choose the Right Paint (You Don’t Need to Overspend)
Good paint matters, especially if you want your mural to last.
You can find quality mural paint from brands like:
Miller Paint
Sherwin-Williams
Behr
If this is your first mural, you don’t need to splurge. Here’s a budget-friendly trick:
Ask the paint counter what their sample quarts are made of. If they’re rated:
10-year interior for indoor murals
10-year exterior for outdoor murals
You’re totally fine using those to start.
Step 5: Paint the Mural
This part is refreshingly simple.

Once your design is transferred:
Follow the shapes
Work background to foreground
Don’t rush the process
You’ll learn so much just by doing.
Step 6: Decide Whether to Seal the Mural
Sealing is optional, but recommended for:
Outdoor murals
Walls exposed to UV light or moisture
If you do seal:
Use a mural-safe clear sealer
Apply with a high-density foam roller
Follow manufacturer instructions carefully
You Did It
That’s it. You found the wall, designed the piece, transferred it, painted it, and optionally sealed it.

You painted a mural.
Beginner Mural Supply List (Quick Reference)
Pencil or chalk
Ruler or tape measure
Level
Paint brushes (various sizes)
Small rollers
Paint trays
Quality acrylic or latex paint
Drop cloth
High-density foam roller (for sealing)
All these supplies and more can be found on my storefront.


https://keonhacai5.com/ mình ghé thử cho biết vì thấy mọi người nói nhiều, kiểu vào xem giao diện là chính. Trang nhìn khá “gọn mắt”, chia khối nội dung rõ ràng nên lướt nhanh vẫn không bị lạc. Mình có bấm vào bài Girona vs Athletic Bilbao (03h00 ngày 05/11) thì tiêu đề để nổi bật, kéo xuống là phần nhận định chia đoạn ngắn nên đọc đỡ mệt. Mấy chỗ kèo/tỉ lệ họ trình bày theo cột nhìn khá dễ hiểu, không phải zoom hay căng mắt soi. Menu cũng đặt dễ thấy nên chuyển qua lại giữa bài khác khá nhanh, không phải tìm nút hoài. Nói chung bố cục thoáng và các khung thông tin được căn đều,…
hitclubvn.vc dạo này thấy mọi người nhắc hoài nên mình cũng bấm vào coi thử cho biết. Vào cái là thấy họ để ngay đoạn nhắc kiểm tra đúng link trước khi đăng nhập, kiểu đặt lên đầu trang luôn nên mình cũng đỡ lăn tăn hơn. Mình không có đăng ký hay làm gì sâu, chỉ lướt qua vài mục hướng dẫn cơ bản với phần chính sách, đọc thấy trình bày gọn gàng, chữ không rối mắt. Giao diện nhìn khá “đều tay”, không kiểu nhảy pop-up liên tục nên trải nghiệm lướt ổn. Cái mình thích nhất là họ có khung hiển thị thời điểm kiểm tra link ngay trên đầu trang, nhìn phát biết liền.
hitclubvn.co.com mình thấy mọi người nhắc hoài nên cũng ghé thử cho biết. Ban đầu chỉ định lướt vài phút thôi mà lại ở lại lâu hơn vì trang nhìn khá dễ chịu, không bị nhồi nhét. Mình thích kiểu họ chia nội dung theo từng khối rõ ràng, đọc lướt vẫn nắm được ý chính mà không phải căng mắt. Bấm qua lại giữa các mục cũng mượt, cảm giác phản hồi nhanh nên đỡ bực. Có đoạn giới thiệu về thương hiệu với mấy điểm nổi bật được trình bày gọn, kiểu ai mới vào cũng hiểu đang nói gì. Nói chung không cần rành cá cược vẫn xem được vì bố cục thoáng và các tiêu đề…
gavang tv dạo này mình thấy có người nhắc tới khi nói về các nền tảng giải trí trực tuyến nên cũng thử mở vào xem cách họ bố trí giao diện ra sao. Mình không đi sâu vào nội dung hay từng trò cụ thể, mà chủ yếu quan sát cách các chuyên mục được phân chia trên trang và cách thông tin hiển thị cho người dùng. Nhìn tổng thể thì các khu như thể thao, casino, game bài hay slot thường được sắp xếp theo từng nhóm khá rõ, hiển thị dạng khối và danh sách nên lướt qua cũng dễ theo dõi. Các bảng dữ liệu được trình bày dạng cột khá gọn, giúp quan sát…
hitclub com mình vô thử cho biết vì thấy bạn bè nhắc hoài, tưởng đâu kiểu web nặng nề ai ngờ mở lên cái là vào khá lẹ. Mình lướt sơ thôi chứ chưa chơi gì, chủ yếu xem giao diện với cách họ sắp nội dung. Cảm giác bấm qua lại mấy mục không bị đứng hay giật, dùng trên điện thoại cũng ổn nên đỡ bực. Mình thích nhất là họ để mấy khối thông tin quan trọng ngay đầu trang, nhìn phát là hiểu đại khái có gì chứ không phải kéo dài mới thấy. Chữ tiếng Việt đọc tự nhiên, menu đặt chỗ dễ thấy nên tìm cái cần xem cũng nhanh. Nói chung bố cục…